Tower Conversion 2
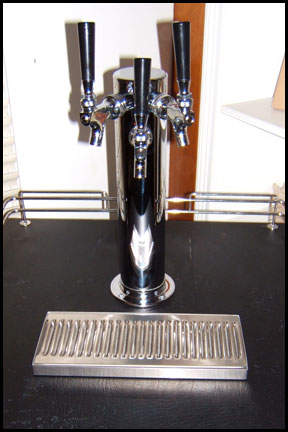
So today I finished my tower conversion, from one faucet to three!
So this took a little longer to finish than anticipated, but it wasn’t because of the kegerator. Sunday is when I began the project, regular life stuff stifled me on Monday, video games at a friends house overwhelmed me Tuesday, but today, Wednesday, I succeeded in a great mission. The greater, pseudo dream fulfilling mission was acquiring the kegerator in the first place, but now pimping it out to a three faucet tower in my own home – – Sha-weet!
So a couple points of preparation. First I wanted to fill the gap between the bottom of the particle board and the top of the metal. This is where there appeared to be a 2″x2″ piece of 2″ foam. I acquired a 4″x4″ piece of 2″ foam. I then proceeded to drill out the middle of the foam to match the rest of the hole in the top of the kegerator. I really had to squeeze to make it fit, but once it was in it was a nice tight fit.
I also, wanted some sort of liner in the new hole I drilled. Originally I pictured PVC pipe, but they do not make PVC in a 2.5″ OD. I bought a small piece anyway, but after taking some measurements at home, I decided I would loose an additional .5″, thus really only opening the hole .5″ which didn’t seem like it was worth all the effort. What I compromised on was a small collar toward the internal side of the kegerator. Basically I took a desk grommet and punched out the top. I then cut out a .25″ section to make it fit my diameter. It worked perfectly. Now there is a smooth edge for the draft tubing to rub against before entering the hole.
I had to re-line-up the holes for the new tower too since it was wider. First I placed the gasket down and marker where the holes would be. Then I placed the tower on top to make sure it matched the gasket, it did not. Two of the holes did, I had to remark the other two holes. It was funny, the tower came with screws to mount it that were like 3″ long, but the particle board it had to go through was only like .75″ long. Fortunately there is that gap where I put the foam where the screws are just hanging.
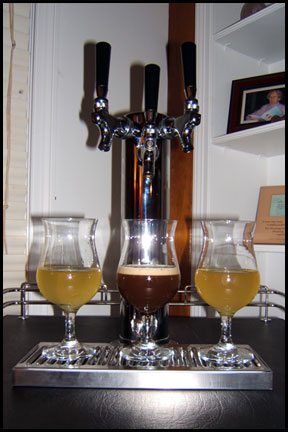
So I had already planned on what the first three beverages were going to be. I knew one was going to be the return of the Gnarleywine, my 2006 Barleywine that had carbonation issues. I also put on the traditional and sweetened Ciders, not because anyone needs that much cider, but it’s that time of the year. I think tomorrow, Traditional Cider with shots of ButterShots in it, yum!
There’s a picture of the first three pours. Or should I say proper pours. I was have issues with the faucet on the right for a good 30 minutes. Every time the liquid line was attached I couldn’t get the cider to stop pouring. Eventually the culprit turned out to be the ‘collar’ on the faucet (below the handle) was not tight enough, thus the seal was not properly set. All in all I would give this a very positive experience in the world of homebrewing.


December 11th, 2008 at 10:22 pm
three brews! or shall i say, tres broos?
December 12th, 2008 at 5:51 am
Sweeeeeeeeeeeeeeeeeeeeeeeeet. How long before you’re looking at upgrading the faucets to forward-seal style Perlick or Ventmatics?
December 12th, 2008 at 9:51 am
As soon as I have $120 that I can blow, so probably not for a while 😉
December 13th, 2008 at 10:20 pm
Sweet cider, yum, yum, yummy!!